If you enabled php-fpm after previously using mod_php for Apache, you’ll notice that your phpMyAdmin URL will no longer work. Raw PHP code will be displayed instead of rendering a page. Don’t worry, this hasn’t exposed your db password or any other compromising details.
Fixing the PHP code output
Apache is rendering the raw PHP code because you initially configured it to use mod_php and have disabled that module in favor of php-fpm. phpMyAdmin doesn’t reside within the usual /var/www/html/ directory which uses php-fpm. Therefore you have to add a ProxyPassMatch directive to your Apache site conf to tell it to route any file ending in .php through php-fpm’s socket. Add the following to your site’s conf (default is /etc/apache2/sites-enabled/000-default.conf):
ProxyPassMatch ^/(.*\.php(/.*)?)$ unix:/var/run/php/php7.2-fpm.sock|fcgi://./var/www/html
Next, reload the Apache service:
sudo service apache2 reloadNow if you try to access phpMyAdmin you’ll likely still run into a problem: File not found.
Fixing ‘File not found’
phpMyAdmin is trying to load from /var/www/html/ yet all of its files are stored in /usr/share/phpmyadmin/. You can quickly fix this by adding a symlink from the phpmyadmin directory to the Apache document root:
sudo ln -s /usr/share/phpmyadmin /var/www/html/Now if you try once more to access phpMyAdmin it should work. If you still encounter File not found you may need to double check that /etc/apache2/conf-enabled/phpmyadmin.conf exists. If it does not, you can add it using another symlink:
sudo ln -s /etc/phpmyadmin/apache.conf /etc/apache2/conf-available/phpmyadmin.conf
a2enconf phpmyadmin
sudo service apache2 reload
Finally if you try again. phpMyAdmin should be working at this point. If you still can’t get into phpMyAdmin, you can try running a re-configuration:
Re-configuring phpMyAdmin
IMPORTANT: Do not allow the reconfiguration to reinstall the phpMyAdmin database in the following steps!
Reconfiguring phpMyAdmin can be helpful if you believe there is something wrong with your Apache configuration for phpMyAdmin. There is a tool which can attempt to correct basic configuration issues with phpMyAdmin. To reconfigure phpMyAdmin:
sudo dpkg-reconfigure -plow phpmyadminOn the screen that comes up, hit enter to advance to the first step of re-configuration. It will ask you if you want to reinstall the database for phpMyAdmin. Highlight NO and hit Enter. If you reinstall your database you will lose all personal configuration options and may break your phpMyAdmin installation even further.
After selecting No, you will be shown this screen:
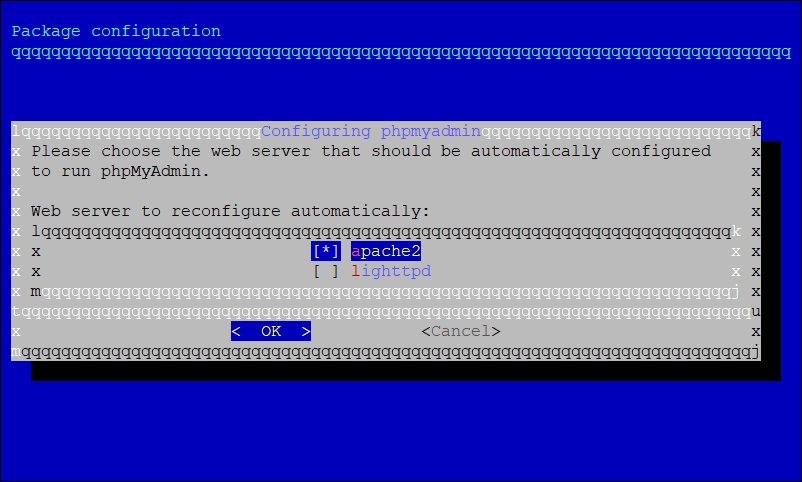
You should see an astrisk (*) next to apache2 by default, but if not you must select it by pressing your spacebar. Afterwards hit Enter to continue with the apache2 configuration step. You should see output similar to the following to confirm the configuration completed without any issues:
dbconfig-common: writing config to /etc/dbconfig-common/phpmyadmin.conf
Replacing config file /etc/dbconfig-common/phpmyadmin.conf with new version
Replacing config file /etc/phpmyadmin/config-db.php with new version
dbconfig-common: flushing administrative password
apache2_invoke phpmyadmin: already enabled
You should now be able to use phpMyAdmin again!